This should be simple… yet, I should have spent as much time on the shield as I did on the entire beater itself.
So lets analyze the Hollander shield's purpose…
Shield Material - You can make your shield out of any sturdy, strong material. ABS, Plex/Lucite/Acrylic, Steel, Aluminum, Fiberglass, Wood, HDPE, Rubber, even having it 3D Printed (I don't have one of those, do you?). What ever you are comfortable working with. For my leaky shield, I used aluminum (easy to bend) for the top and back and Acrylic for the sides of the shield ('cause I wanted to see the beater in action).
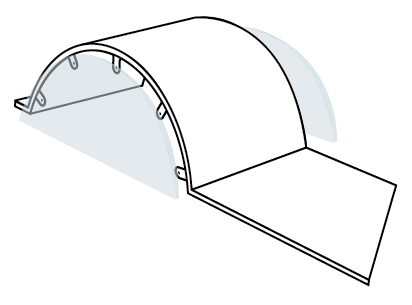
Forming Shield - I had access to a big rolling mill, so I rolled a curve bigger than the drum and encompassed the backfall. The reason being is that you want to 1. Keep the water and pulp in the beater and 3. Help with circulation of the material. The drum is going to drag the pulp between its blades and the bedplate and then throw it over the backfall. Also you need some room to move the drum up and down within the shield.
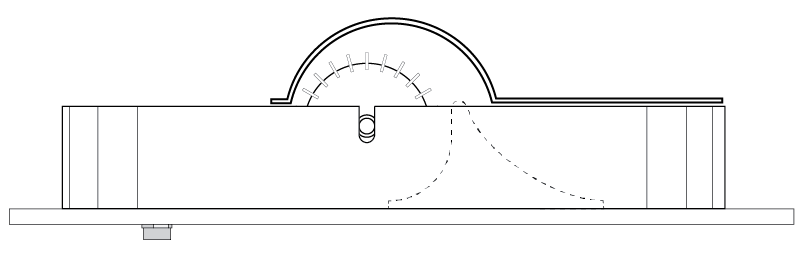
Since my piece of aluminum was inadvertently larger than the channel of the beater, when I trimmed it down, I cut out little tabs on both sides and bent them down and drilled a hole in each of them on both sides. I used Acrylic for the sides, so I could see what was going on in the drum area. I pop-riveted the Acrylic to the little aluminum tabs on the shield.
Unexpected Additions - I tried to anticipate leakage and some way to securely mount the shield to the beater. I thought that if I put rubber flaps on the inside of the acrylic, pointing down from the bottom, it would keep the liquid inside the trough. That was a no…it didn't work the first time and just got in the way of the drum spinning, eventually adding little red rubber bits to the pulp. I took those flaps and flipped them to the outside. It just focused the leakage. They ended up being removed.
Since the body of the beater is wood, I drilled little holes through the aluminum and put small brads through the holes and into the wood. This just held it in position, it still leaked like a sieve.
The solution (that I have been using for 4 years) Duct Tape or now Gorilla Tape. Put the shield in place, add the small brads, tape both sides of the upper curve, tape the shield edges and acrylic edges to the beater trough walls.
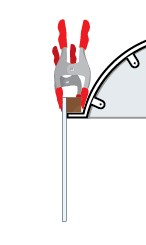
Addition Two: - As the drum turned, not all of the slurry went over the backfall. Some was carried over the drum and fell in the front of the drum. This "waterfall effect" can keep the slurry material from moving under the drum. If you mount an adjustable panel on the front of the shield, you can keep the slurry material moving. I added a block of wood to the front of the shield and took a piece of Acrylic (the width and depth of the trough) and attach it to the block with hand clamps on each end of the block. If the panel is too high, it creates the "waterfall effect" and if too low, it creates a damn. Both do not let material under the drum.
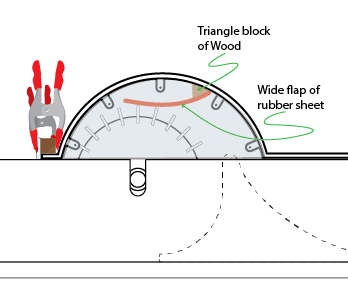
Addition Three: - You would think that 450 RPM of the drum, wouldn't hold onto the slurry so much. But it does. I order to get the flow moving better over the backfall, I put a flapper that is connected to the top of the shield and rides on the blades of the drum. This dramatically increases the flow.
Many of the manufactured shields on commercially available beaters fit really tight and are well engineered. If you are constructing your own beater, please put as much thought into the shield as you have in the beater itself.