Along with small scale pulp making, small scale (or just small) sheet forming is perfect for the occasional user or classroom situation. We all have to start some where, so many beginning papermakers start with a little screen & deckle, and a blender (plunge/stick blender or a rudimentary hydro-pulper = paint mixer paddle on a drill).
Glossary of Paper Making Terms
The mould and deckle is a two part item. The mould is a frame with some type of support screen stretched over it. The deckle is a frame that fits on top of the mould which determines the size and shape of the paper. The deckle holds the liquid pulp to shape while the water drains away. There are different versions of mould & deckle set-up and different methods of sheet-forming. This post describes a "wove" mould and dip method of sheet forming. More on other types and methods later.
Couching - Pronounced “cooching” (it’s derived from the French coucher, “to lay”), this is the process of transferring the wet sheet from the mould to another surface (the felt) to dry.
Felts - Sometimes called couching sheets, these are the pieces of material used to separate sheets of wet paper while they dry. Felts are available at art, craft or fabric stores; however, interfacing or old wool army blankets can also work well.
Pulp - The mix of water and fibers. You can create pulp from cotton linters (sold at art supply stores) and other plant fibers, or reusing scrap paper and junk mail.
Making Simple Screens
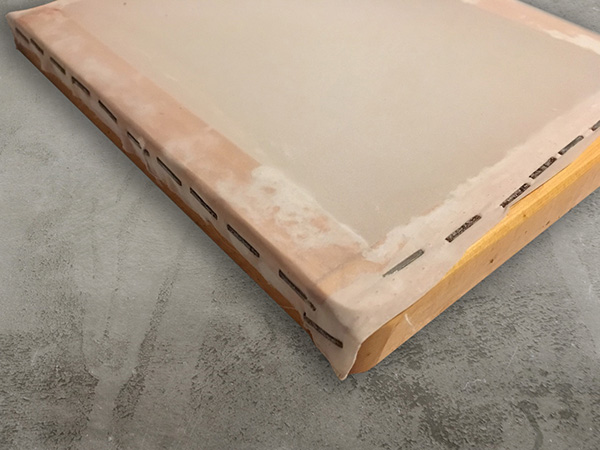
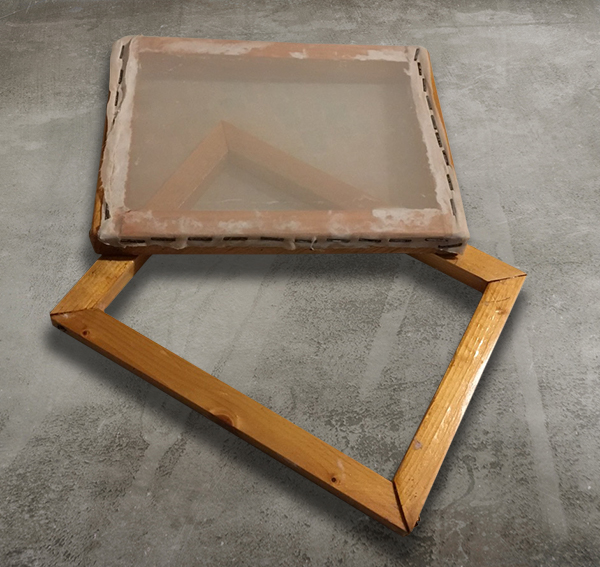
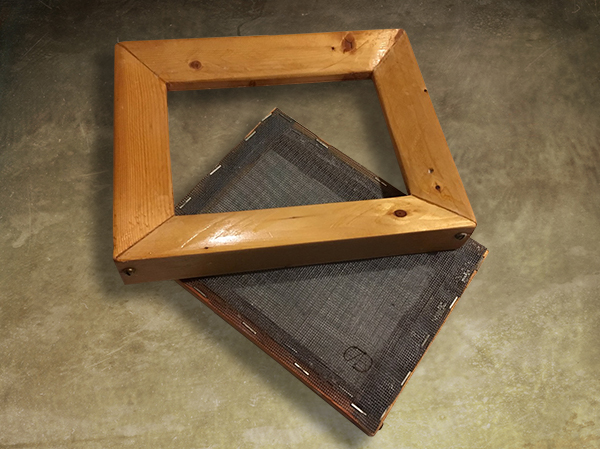
I assume too much sometimes. I have woodworking skills so I assume everyone else does as well. I won't assume that here. What you need to acquire is two wooden frames that are the same size. Pick a size that is workable for you and makes a sheet of paper that you can use, like a note card size (5.5" x 8.5" or smaller). You can buy paper making mould & deckle from Arnold Grummer/Amazon, Dick Blick, Etsy and others. Some picture frames would work but picture frames are really expensive. You can use canvas stretcher bars for making painting canvas. Stretcher bars are not crazy expensive and easy for the novice woodworker to put together (make two, one for the mould and one for the deckle). You could also use a pre-made silk screen frame, if you can find a frame for the deckle. If you are really desperate you can use an embroidery hoop or a splatter screen for cooking.
Now that you have two frames (only one needed if you are using an embroidery hoop or splatter screen), you need to screen one to support and drain the paper pulp. There is a variety of materials you can use. The purpose of the screen is to collect, support and drain the paper pulp. The screen needs to have small enough holes to collect or hold the pulp without falling through the holes. The screen needs to be stiff enough to hold the pulp without sagging (sometimes it is necessary to have a support screen underneath). The screen needs to have enough holes to drain the water away from the paper fiber. Some choices of screen are listed below:
Metal Screen
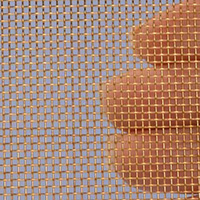 Metal screen comes in a variety of materials and mesh sizes. A tighter mesh and heavier material is a good choice.
Window Screen
 Window screen is typically plastic or fiberglass mesh. You can buy aluminum window screen as well. Fiberglass window screen comes in two mesh sizes, insect and small insect. What mesh size "insect" and "small insect" is, I have no idea. Typically the "insect" mesh is a little too large for paper making. You can take two window screen material and offset the holes when mounting to produce an acceptable mesh. Depending on the size of your mould, you may have to add a support screen below the screen (more on that later in the article).
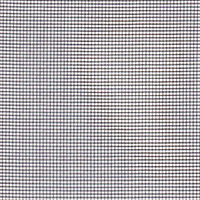
Silkscreen Material
 Silkscreen material is a fine screen made of polyester fibers (in pairs or single filament) in different mesh sizes. For silk screen, the lower number of mesh the better. They range from 60 to 230. The most common mesh size found is 110. It is slow draining but makes a nice, smooth sheet of paper.
Plastic Canvas
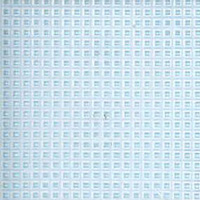 Plastic canvas is a crafting material that is stiff and open. Perhaps too open. The tightest mesh that I have found is a 14 mesh. Small but not quite small enough. This material makes excellent screen backup material (for holding up saggy or weak screen material).
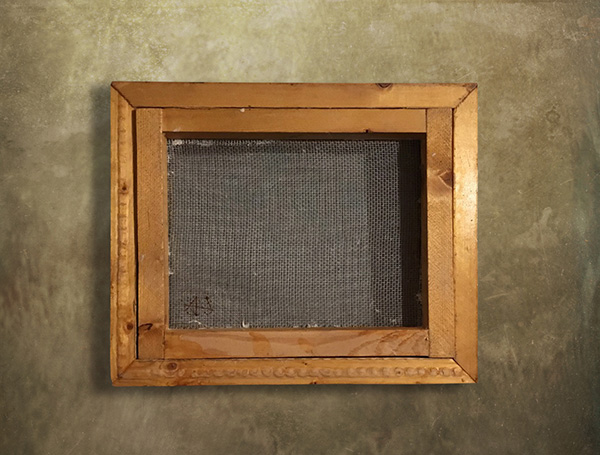
Now you need to attach the screen to the frame. If you are using a flexible screen material, the easiest way to attach it is using a staple gun. It should be tight and long-lasting. Cut the material (this includes the backing material if necessary) a little larger than the frame. Lay both materials down on the flattest side of the frame (frame, backing screen, screen). Put a staple in each side, pulling each side tight. Then alternate sides adding staples as you go.
The edges of the screen material should be trimmed to the edge of the frame. The edges need to covered so it doesn't snag or collect renegade paper fibers. One of the quickest ways is to use the "fix-all" duct tape or Gorilla brand tape. Cover all four edges, making sure not to go past the interior of the frame.
The Deckle
Since this is a quick mould and deckle, the deckle is flat and uses hand pressure to create the seal between it and the mould. If you want a tighter fit, you can add foam weatherstripping tape to the bottom of the deckle (the part that goes against the mould). Please note that when this tape gets wet, it absorbs water and expels it when is compressed. Make sure it is compressed before making a sheet or it will thin the edges of the sheet.
You can urethane the exposed wood if you want, but if you get the paper making bug you will probable move to larger, better moulds. So it is up to you.

Using the Pulp (Sheet-forming)
Before you start sheet-forming, make sure that your workspace is all set up.
Carefully and very level, remove the deckle and move it away from the new sheet. Take a felt or other couching material and lightly wring the water from it. Build a small stack of felts or other couching material to create a small pile to start a couching post. Take the mould with the freshly made piece of paper, place it at an edge (left or right) of the stack and roll it from one edge to the other. Apply pressure to the mould to transfer the paper from the mould to the couching material. The wetness of the couching material attracts the fresh paper and detaches it from the screen. Cover the fresh paper with another wrung out couching material.
If the paper doesn't couch don't panic. Either the felts are not wet enough or you weren't able to apply enough pressure (one of the reasons for having ribs under the mould). One way you can get it to release (technique by Catherine Nash) "place the mould on the stack of felts, paper side down and push down on the back of the mould with a wet sponge". This will add more moisture to try to transfer the new sheet to the felts and also add pressure to the mix.
Continue the sheet-forming process, adding more pulp to the vat every three or four sheets. If you only made one pitcher of raw pulp, your done! If you have more, add a cup or two of raw pulp to the vat. Continue until you are out of pulp. Or your stack (or post) is too tall to add any more felt, paper, felt, etc.
Finishing your paper
There are a variety of ways you can complete your paper. The traditional way is to press the stack of felts and paper under pressure to squeeze as much water out as possible and compress the paper fibers into one another. Then take the delicate "waterleaf" paper (as it is called now) and place between blotter sheets and more pressure or blotter sheets and corrugated cardboard in front of a fan. The simple way is to let the sheets dry on the felts or carefully iron the felts and paper. Some people lay them on a smooth flat surface and wait until they dry. Ironing does dry the paper quicker and flattens the paper some what.
Experimentation
You can add a variety of other fibers to the sheet forming vat or added to the wet sheets themselves after couching. Small flowers, grasses and leaves can be thrown into the vat for a random, natural decoration created on your sheets as they are formed. Random is the best! Or you can take live or dried (which works very good) and add them to the couched sheets or the "waterleaf" sheet before they are completely dried. In fact, the sky is the limit with surface decoration, dying and embedding objects in fresh sheets of paper. Experiment. Be free. Have fun.
You can also experiment with other sheet-forming moulds. For example: