Building the tub for the Hollander involves making some critical decisions like, tub material, amount of pulp it is going to make, depth, and where am I going to put this thing…
In the research section and the math page, a lot of these decisions have been completed. At the time I was building the beater, I had no welding skills. I have wood working skills but wasn't sure that I wanted to make the beater out of wood. Before I dove into this project, I thought I should look at other things that were a similar shape.
Nothing really existed without major modification. It can be done. I saw a beater made out of a galvanized washtub. Odd but worked. I was going for something a bit more traditional.
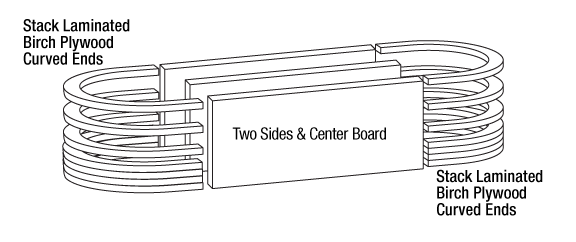
I looked at 4x4 3/4" of Baltic Birch Plywood. A bit pricey. Especially since I was thinking about stack laminating the pieces so I could get the right shape without a lot of difficulty. See drawing below:
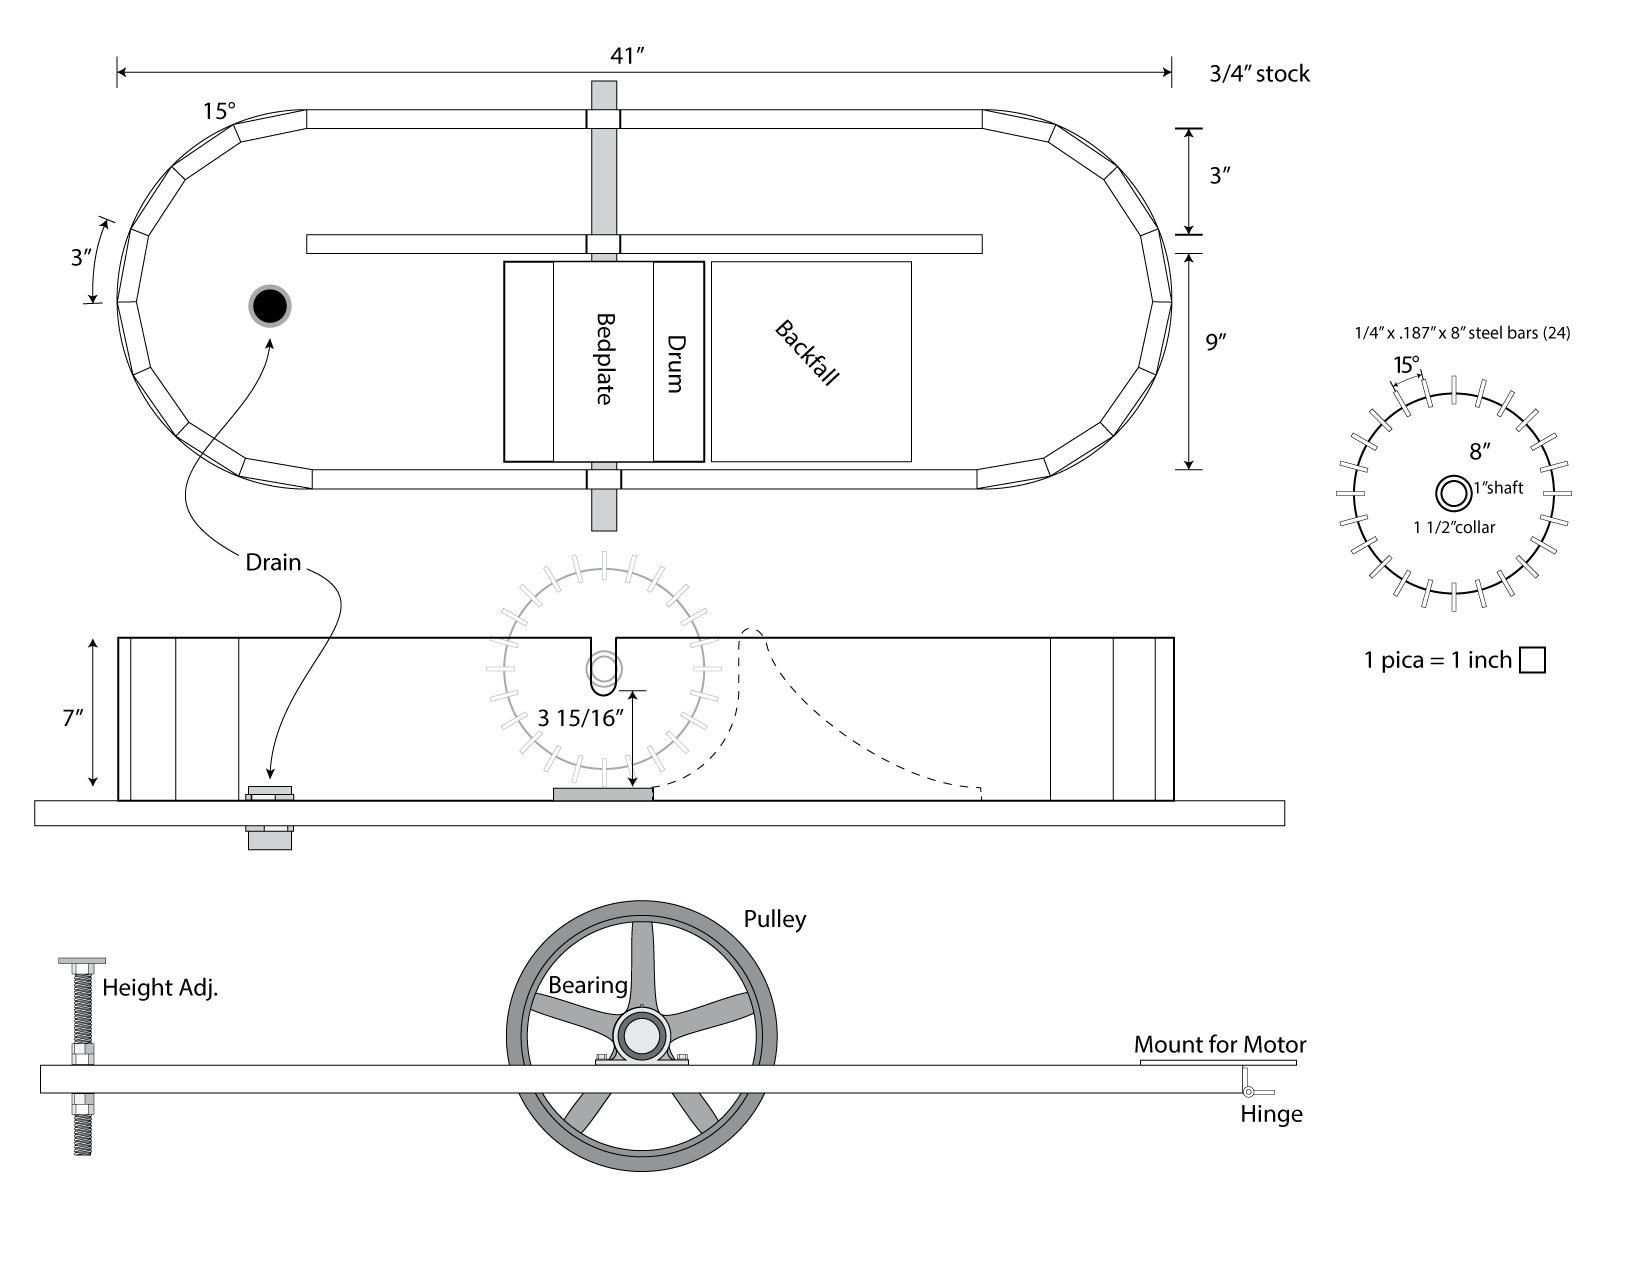
So pricey-ness aside, what other wooden method can I make. On Woodwaredesigns I saw a Hollander Drum coopered together out of wood like a barrel. If I built it this way, I could use cheaper wood (3/4" Fur) and if I fiberglassed the tub, it would be waterproof. I must have figured out the angles of the ends about a million times. I even built it in a 3-D program to check the angles. Everything checked out, until I started cutting the staves. I made the first end, too tight a curve. The second one, too loose of a curve. My problem first was the angle of the edges on both sides of the boards was too much with a straight edge on the first and last board. The second time, I made a straight side and angled side on all boards. 22.75° seemed really good yet it didn't end well. 15° seemed even better but ending boards needed a 90° on one side. It ended up being 10°, sort of. First drawing is below. The second revision is below that. The difference is the motor - drum arm is made of steel. Note measurement changes.
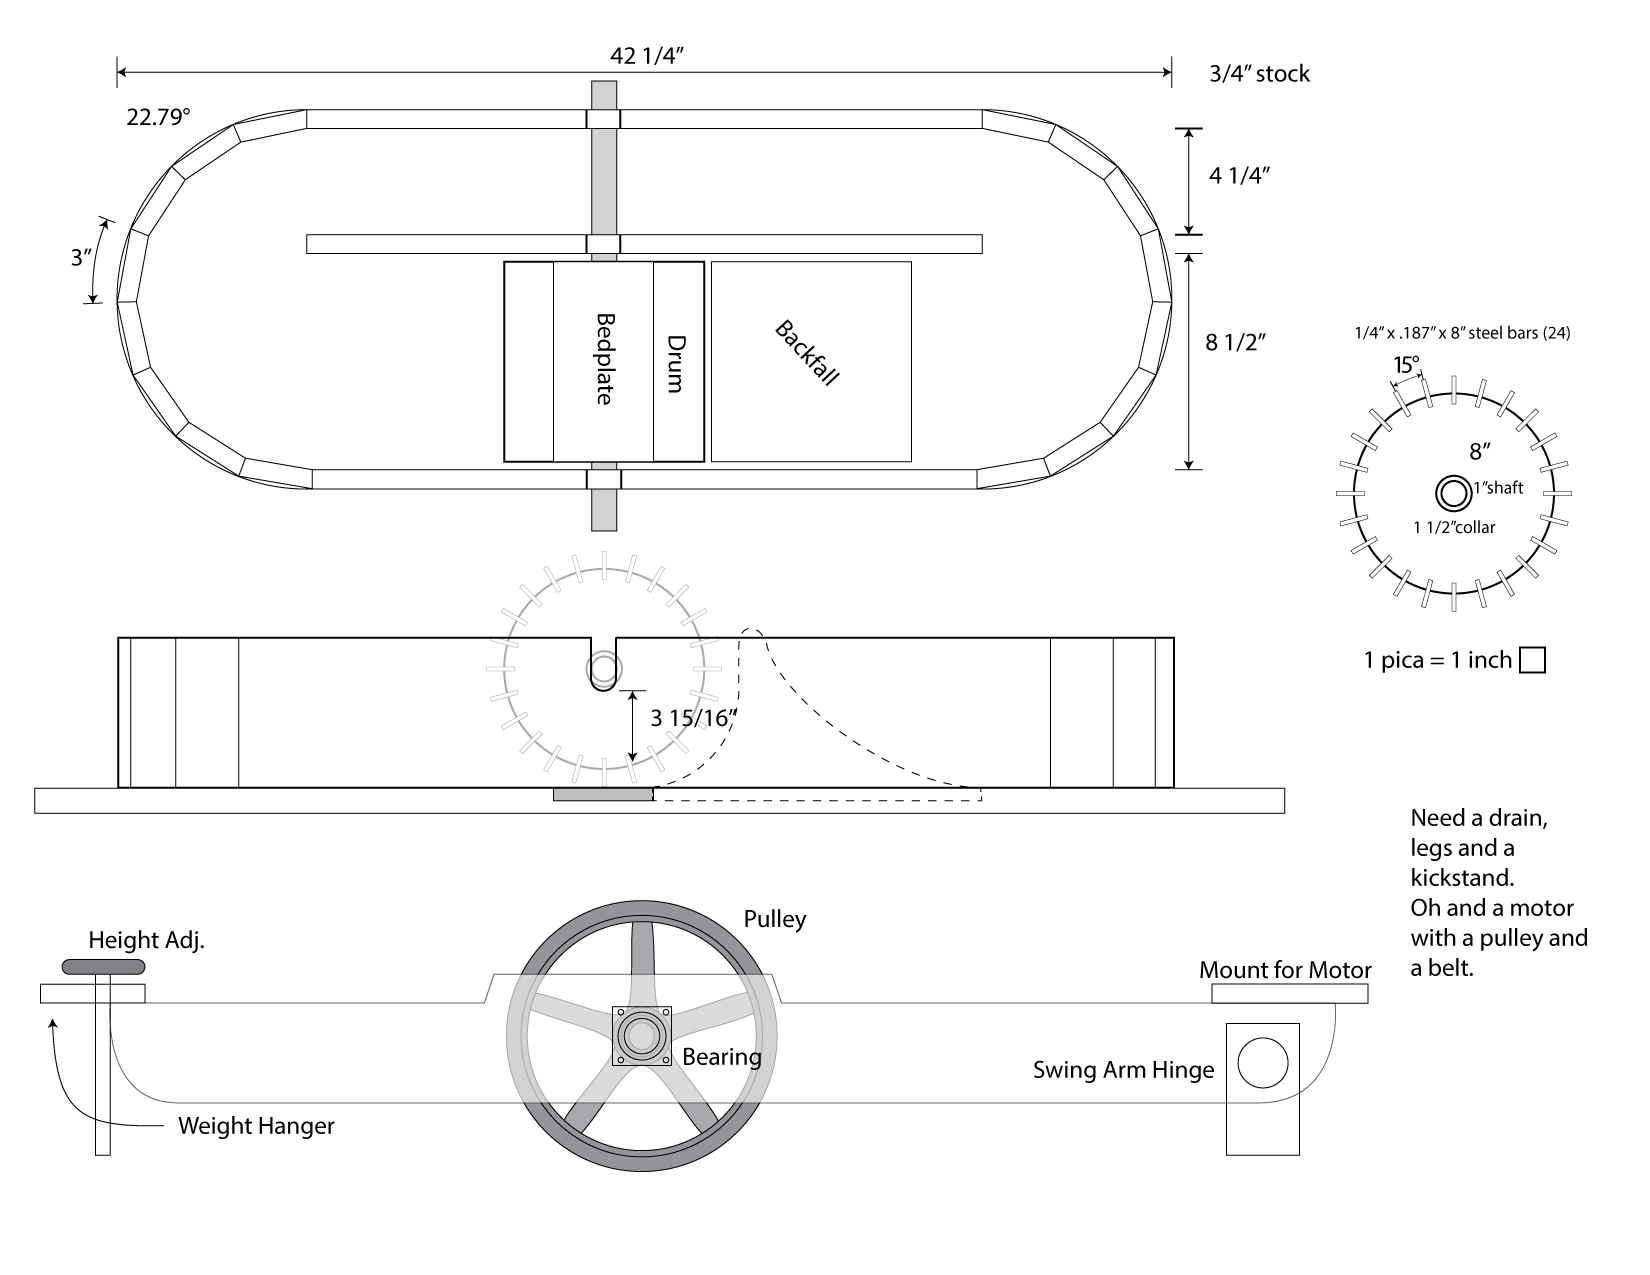
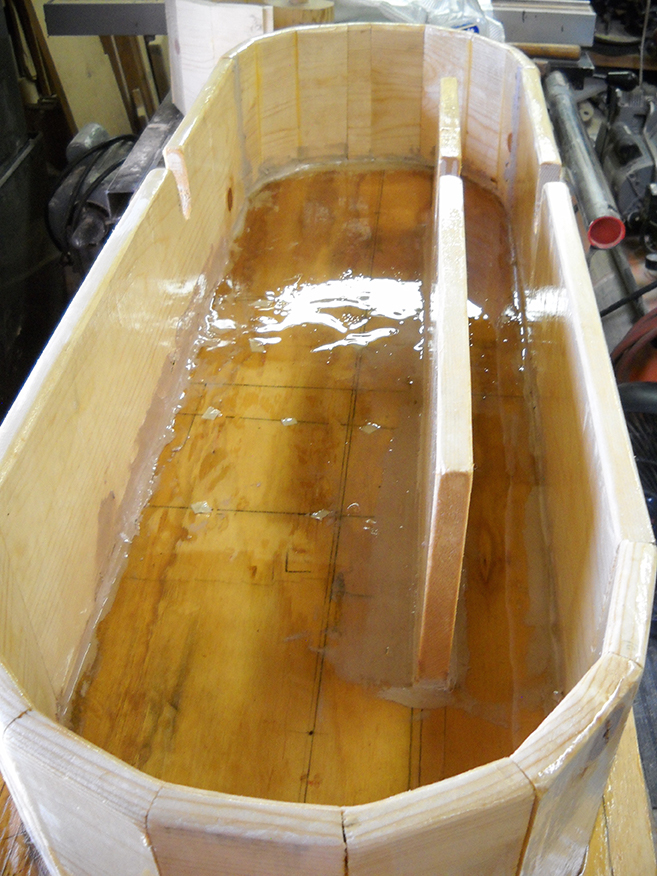
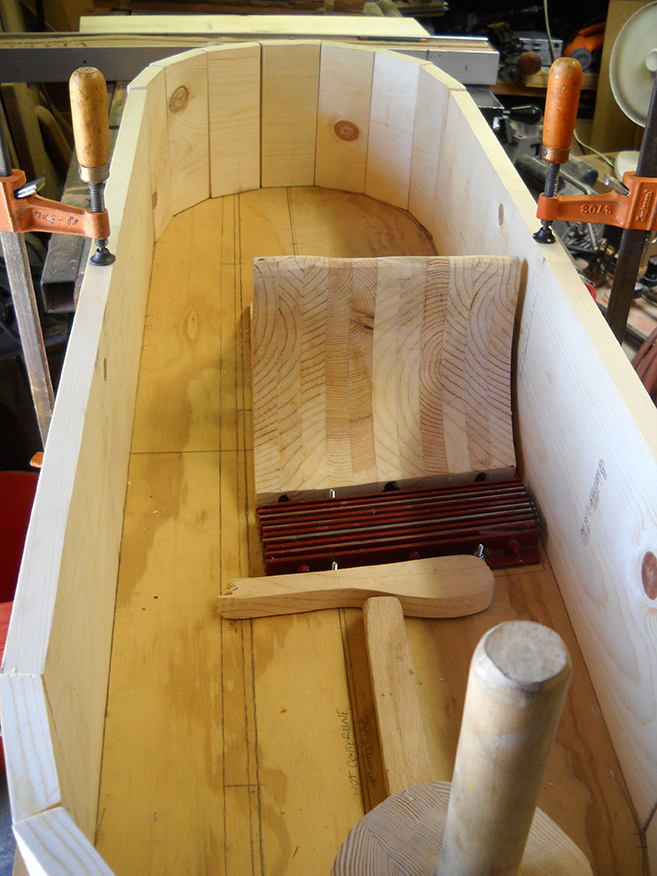
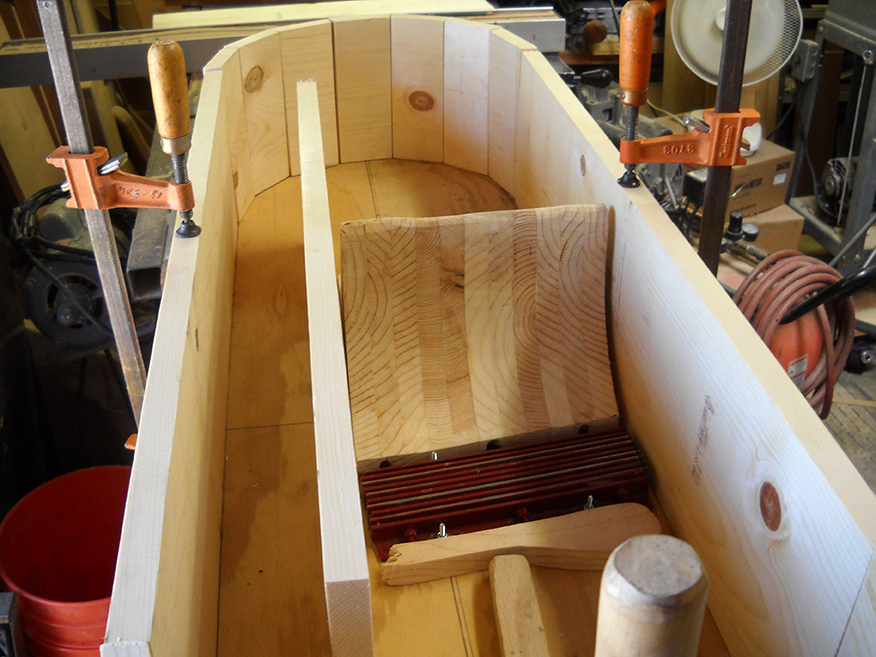
Another problem I had was that I couldn't find a long enough keyed stainless steel shaft. 18" long. One side had to be 8"-9" because of the drum. If the shaft is only 18", I needed some (2") for the bearing on both sides, another 2" to mount the driven pulley. This really only leaves 3" for the return trough. After the fact, the 18" shaft was too tight. I found a longer one later but I already built the tub, so I just went with it. In fact, I found a really long one, which I will use for another beater that I plan on building. The pulp flow isn't affected that much by the smaller width of the channel. I made the ends first, gluing and clamping them. Then the sides and the midfeather. I drew this out on the base plywood board and glued them to the bottom (and each other) as I went. Note: I didn't start building the tub until I had the drum made so I could be sure that the drum fit in the tub.
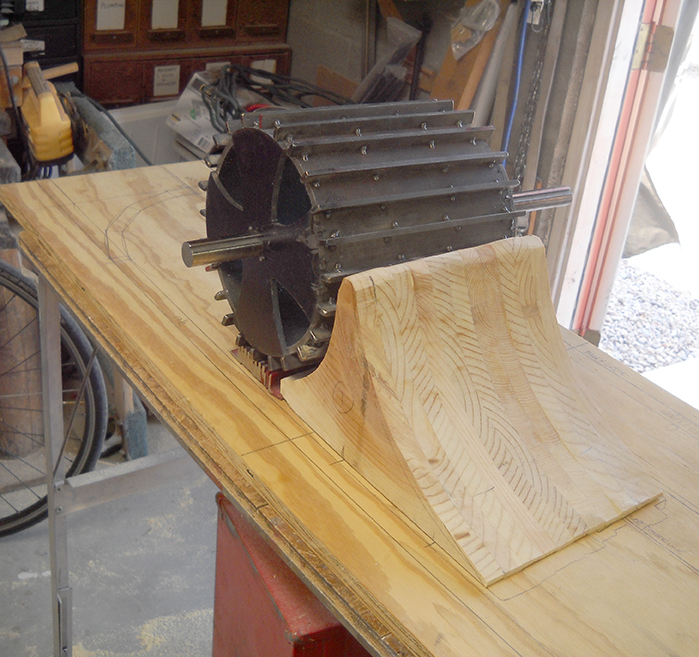
The Backfall
The backfall was cut out of 3/4" planks and then stack laminated horizontally. 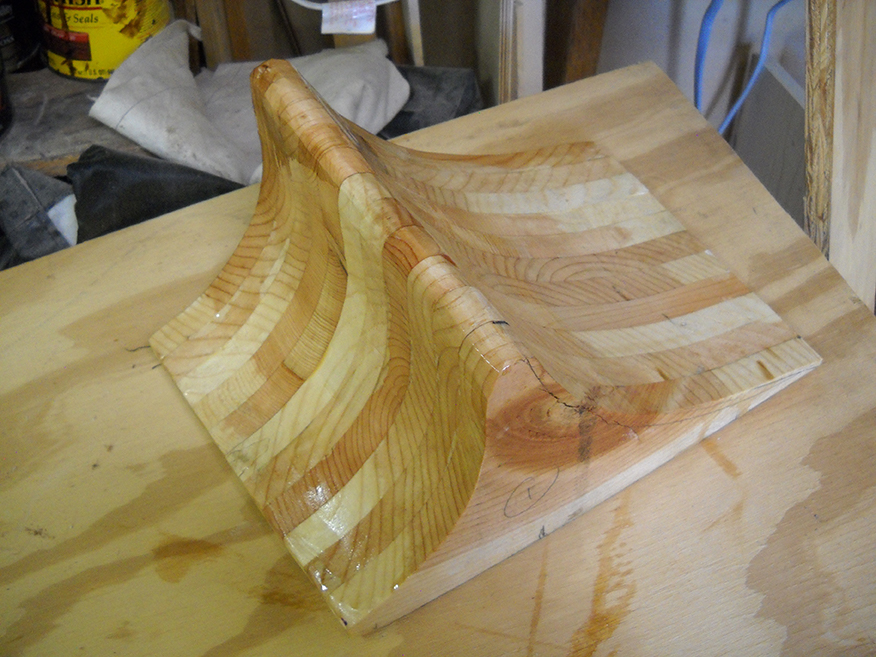
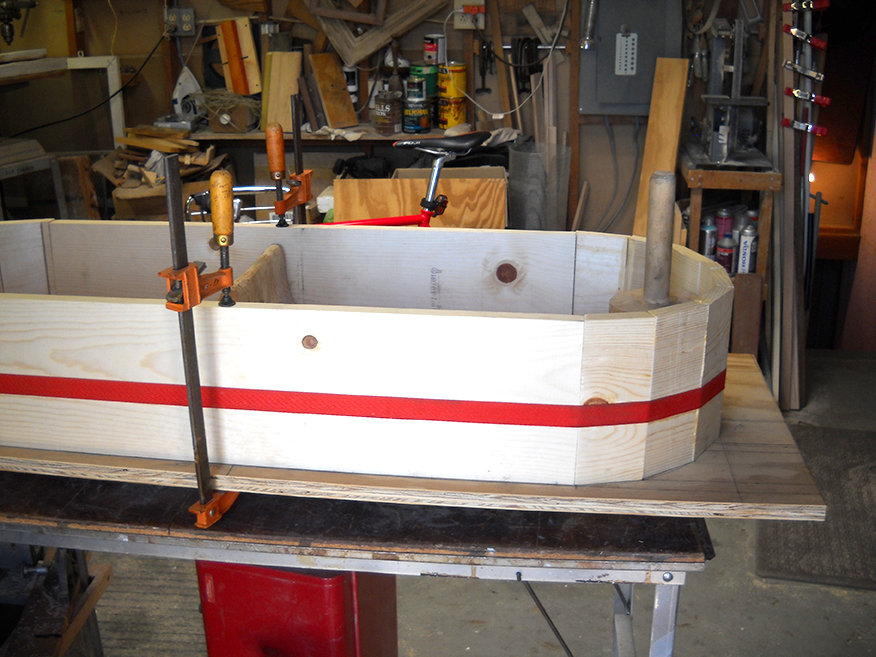
Assembling the Tub
Basically the curved end pieces were assembled and set in place. Then the sides and midfeather. Then set in the bedplate and the backfall for position.
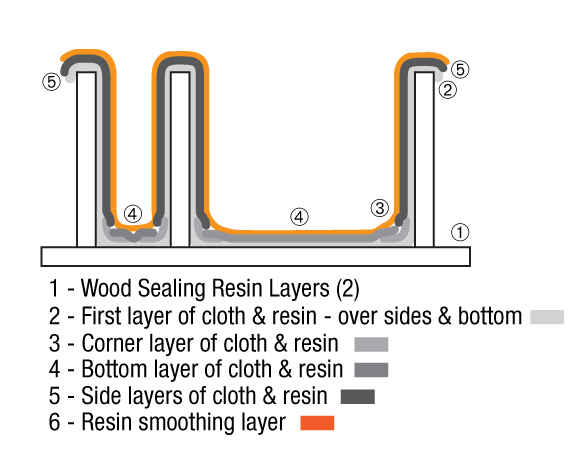
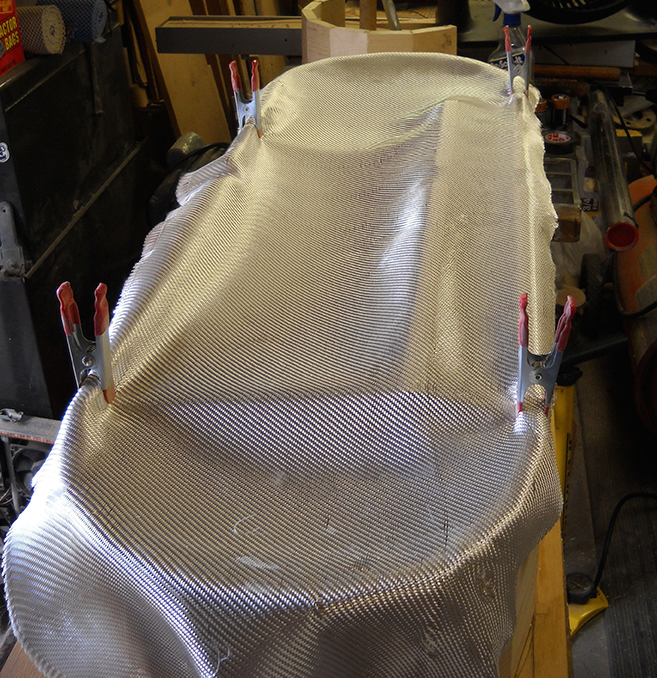
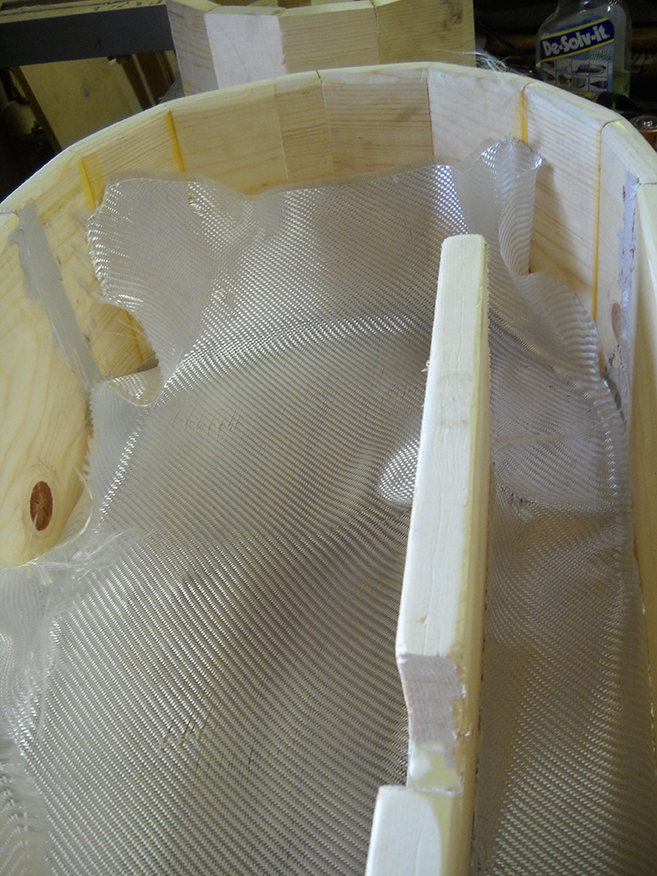
Waterproofing the Tub with Fiberglass
The information about Fiberglass process comes from Donald May of Meledo Enterprises. I did some fiberglass, gelcoat, and urethane work using Meledo Enterprises many, many years ago. Great guy. So with Don's help we determined that I would need: